
If a picture is worth a thousand words, than a video is the equivalent to an entire chapter. There is just so much that can be learned from a video, and yet only about 20 percent of trail camera users take advantage of this feature.
For those who are in the majority of the non video users, this complete guide from battery life and SD cards to video resolution and trigger speed, is designed to give you all the needed information to taking the jump to using your trail camera’s video mode.
When You Should Use Video Mode
The great thing about using video mode, is it can be used in almost any situation. From monitoring a scrape, to a travel corridor during the rut, to open fields during the Spring when turkeys are strutting.
The only time in which I do not use video mode is when the camera is placed over some sort of supplemental food source. Feeders, mineral sites, and bait piles are areas in which a large amount of deer will congregate for a substantial amount of time. Running video on these types of sets, will only result in hours of continuous clips of the same doe and fawn feeding. Its not exactly much watch TV, and will wear down your batteries and fill your SD card at a much faster pace.
Video Resolution
There is a lot of hype placed on the resolution of a video, and rightfully so, but I find that in general most people do not realize what the resolution really means, other than it creates a more clear image. So, lets break down what resolution really means, and how it translates to trail cameras.
Progressive VS Interlaced
In most cases you will see video resolution displayed as 1080p or 1080i, for example. In general it is important to understand that the “p” does not stand for pixels. The “p” actually stands for progressive and in the case of 1080i, the “i” represents interlaced.
Both progressive and interlaced resolution is based solely on the way that the video is displayed while viewing it. These systems are based on the way the picture is painted on the screen. This action happens so quickly that you will never be able to pick it up with your eye.
An interlaced system paints all of the odd lines first and then goes back and paints all of the even lines. For instance it would paint lines 1, 3, 5,…..1079. Then go back and paint all of the even lines between them 2, 4, 6,……1080. The problem with most interlaced systems is that it causes a slight flicker in the screen. The only way to eliminate this problem was to increase the number of times a screen is painted per second.
As technology increased, we have seen more companies go away from interlaced systems and move toward a progressive system, which paints lines on the screen in numerical order. In doing so, it eliminates the flicker that is sometimes perceived by interlaced systems, and it allows for the screen to be painted at a faster clip per second.
Long story short, the “p” that is used as a suffix for the resolution has nothing to do with pixels but everything to do with the way the video will be displayed. Almost all trail cameras on today’s market will use progressive display systems.
Pixels
As we have mentioned the number of pixels on a video has become quite a hot selling point for trail camera companies. Having more pixels on a screen at one time, creates a crisp clear image. The clearer the image, the more detail that is available, creating a better watching experience.
The number of pixels is described by how many horizontal columns by how many vertical rows a video will produce. For instance a 1920 x 1080 would be displayed by having 1920 columns of pixels that are displayed from the left to right of your screen, and 1080 rows that would are displayed from top to bottom. The amount of actual pixels that are displayed would be calculated by multiplying the two numbers together ( 1920 X 1080 = 2,073,600 pixels).
Here are the most common video resolutions for trail cameras :
- 720p- 1280 x 720, this is commonly referred to as HD resolution
- 1080p- 1920 x 1080, is commonly referred to as Full HD or FHD resolution
- 4k- 3840 x 2160, is known as Ultra HD or UHD reslution. It is called 4k because the width is close to 4 thousand pixels and in the world of marketing 4k sounds better than 2160p.
When looking at a trail camera, the video resolution is only what it is capable of capturing. The other side of the coin is to have a device that is able to play these resolutions. If your camera is recording in 4k capacity, but your computer you are watching the videos on is only able to display 1080, then you will be stuck watching the video in lower resolution, which is known as downsampling.
Frames Per Second
When talking about trail camera videos, frames per second, or FPS, is as important, and in my opinion more important than then the pixel resolution. Frames per second is simply the amount of frames that has been recorded for every second of video.
In its most simplest terms, the FPS is how many individual pictures are stitched together per second to create a video. The greater number of frames per second, the smoother the motion within the video will appear.
When we discussed the difference between progressive and interlaced systems we coined the term “painting” when the screen displays each line. That display is faster than we can see, but the FPS is how many times every line can be painted per second.
When we begin to talk about 1080p at 30 frames per second that means 32,400 lines are painted every second of video (that is 62,208,000 pixels a second). This is such an amazing speed, that videos with this quality are virtually seamless.
Most trail camera manufacturers use one of these video recording speeds:
- 15 Frames Per Seconds
- 30 Frames Per Second
- 60 Frames Per Second
The reason I personally feel that the frames per second is more important that the resolution, is simply because trail camera manufacturers use the resolution as a marketing tool in order to sell more cameras. For instance, you will often see a trail camera company tout the ability to film in 4k resolution but upon further investigation they are only filming at 15 frames per second.
To further emphasize this point, the following is a chart on how many lines are painted per second of filming:
| 720p | 1080p | 4k | |
| 15 FPS | 10,800 | 16,200 | 32,400 |
| 30 FPS | 21,600 | 32,400 | 64,800 |
| 60 FPS | 43,200 | 64,800 | 129,600 |
As you can see the amount of lines that are painted per second of film for a 4k resolution video at 15 FPS, is the same as the amount of lines painted for a 1080p video recorded at 30 frames per second.
It doesn’t take a lot of math to point out that the amount of pixels used on the 4k video will be more, but it is important to understand that with more frames per second the smoother the motion will be, and in this example the 1080p video will be moving at a much quicker rate.
The same logic also applies to recording a video with 720p at 30 FPS versus 1080p at 15 FPS. When purchasing a trail camera, just be aware of the frames per second, you will be more satisfied with the end results.
Video Length
The length of video is an important part of setting up your trail camera’s video. If you make the video too long, you are wasting valuable storage space. If you set your video too short, you might be missing a lot of action.
Setting the Length
Trail camera’s on today’s market range in video length from 5 seconds up to 5 minutes. Each manufacturer will have their own length options that may vary from camera to camera. Five seconds and five minutes are the two extremes of video length, and neither are seemingly applicable to any situation.
The delay options of a camera are also important depending on the situation. The delay is simply how long the camera will go “dormant” after a video recording has ended. In some situations where a deer may stay around the area, such as a scrape or a watering hole you would want to have a longer delay to avoid allowing one deer to fill up your available storage space.
There is not a specific setting for each individual situation, but below are some examples of how I would set video mode based on the time of year, and the terrain.
| Location | Time of year | Video Length | Delay |
| Scrape | Rut | 15-20 Seconds | 2 Min. |
| Field Edge | Summer | 10-15 Seconds | 5 Min. |
| Creek Crossing | Winter | 10- 15 Seconds | 10 Sec. |
| Saddle | Rut | 30 -60 Seconds | 5 Sec. |
| Conifer Stand | Winter | 15- 20 Seconds | 2 Min. |
The length of video and the length of delay depend strictly on the amount of information I will need and the length of time a deer will stay in the immediate area.
For example a saddle during the rut will be a longer video, just for the fact that a buck might be trailing behind a doe. The length of time it takes to trigger another video would have me worried about ending a video in hopes that another one would be able to trigger and capture a deer running close behind. The quick delay is based on the fact that in transition areas such as a saddle deer will not tend to linger, so the ability to have another trigger quickly is to your advantage.
Smart IR Video
In 2018 Browning trail cameras introduced a new patented technology called Smart IR video that makes all of the discussion about video length a moot point. The smart IR video is a technology that is set up to record video for as long as the animal is in front of the camera.
How it works is that it combines the use of the PIR sensor and the video. The PIR sensor, also known as passive infrared sensor, is what detects both infrared heat and motion of that heat, and activates the trigger of your trail camera. By using the PIR sensor to detect heat and motion, Browning connected it to the video mode within the software of the camera.
When an animal steps into the detection zone of a camera, the video will record. When that same animal leaves the detection zone, the video will stop. Thus creating almost no footage of a blank screen. Saving you time watching, and space for storing unneeded videos.
Trigger Speed
When you see the trigger speed advertised for a trail camera just know that the trigger speed they are advertising is for photos, and that it takes longer for a camera to begin recording video.
How a trigger speed is measured is from the moment the camera detects heat and motion to the time it actually begins to record onto the image sensor.
When an animal walks into the detection zone, the PIR sensor picks up both IR heat and movement of the heat. This detection activates what is known as the light meter, which simply reads the amount of light that is in the immediate area.
The light meter will then relay that information to the exposure tables, which will calculate the amount of light, and plug it into a previously written algorithm within the software of the camera. That algorithm will make the necessary adjustments to the camera’s flash, shutter speed and ISO, in order to create the correct exposure for a quality picture.
A camera that advertises a very fast trigger speed from .3 seconds and faster, will likely have a video trigger speed close to around 1-1.5 seconds. It is important to take that into consideration when hanging your trail camera. Angling the camera at a 45 degree, toward a trail, will allow the PIR sensor to detect an approaching animal quicker, and it allows the animal to stay within the field of view for a longer period of time, making up for a slightly slower trigger speed.
Battery Life

Going from basic trail camera photo mode, to video mode, can greatly impact the amount of battery life you will see. But how much of a drop in battery life will you see? To be honest that depends on the camera, and a host of other influences.
Lithium Batteries
If you haven’t heard by now, you need to use Lithium Ion batteries. Every trail camera manufacturer recommends them over Alkaline and here is why.
Most trail cameras run on a 12 volt system (8 batteries at 1.5v each). Alkaline batteries have a charge of 1.5v per battery, but as the battery is used, they have a fairly consistent rate of loss of voltage. As the battery looses voltage, the camera that is designed to run on a 12 volt system will lose power to some of the key components, such as power of flash, speed of trigger speed and distance of detection.
As the discharge continues, once the battery drops below 1.2v the camera will shut off, not having enough power to operate key components.
Alkaline also uses a water based electrode, which means as temperatures begin to drop the chemical reaction inside the battery begin to slow down. And even worse when the weather begins to freeze, the water base electrodes will freeze as well, creating a potential situation where the battery might begin to expand and crack.
Lithium Ion batteries on the other hand have a consistent output of voltage throughout their life cycle. As the battery uses energy, the chemical makeup, allows the battery to use the same amount of output until there is no more energy to use. Meaning you will have a consistent 1.5 output throughout the life cycle of the battery.
Lithium ion batteries are also incredibly durable during cold weather, having a cold weather rating of -40F, which is much colder than most trail cameras are rated to operate.
Batteries: Video vs Photo
When comparing the battery consumption between video and photo modes on your trail camera it is important to realize that each camera will have different results, and that these are generic assumptions, based on 15 second videos.
When a trail camera is at a resting state regardless of which mode you plan to use, the camera is consuming the same amount of watts. The PIR sensor is tracking infrared heat and motion at the same output in both settings.
During daytime activity, it has been noted that the with the same amount of triggers, video mode can consume up to 4 times the amount of watts as you would see with photo modes.
At the same time, with the amount of triggers being equal, studies have shown that video mode will consume nearly 10 times the amount of wattage as photos mode, during night time.
The reason for this is simply because the camera is more active when recording video. The artificial lights stay on at a longer rate, and the shutter stays open for much longer periods of time, creating the image sensor to take in more information.
All in all the battery life of your trail camera will be about 25% of what you will see with camera modes. So if you regularly experience 8 months of battery life in photo mode, you can expect roughly 2 month while using your camera to capture video.
SD Cards
When you run your camera in video mode, the most important things you need to take into account is the amount of storage that a video will take up on your SD card, the type of SD card, and how fast the card will write. All three of these are important to recording and saving your trail camera video.
SD Capacity
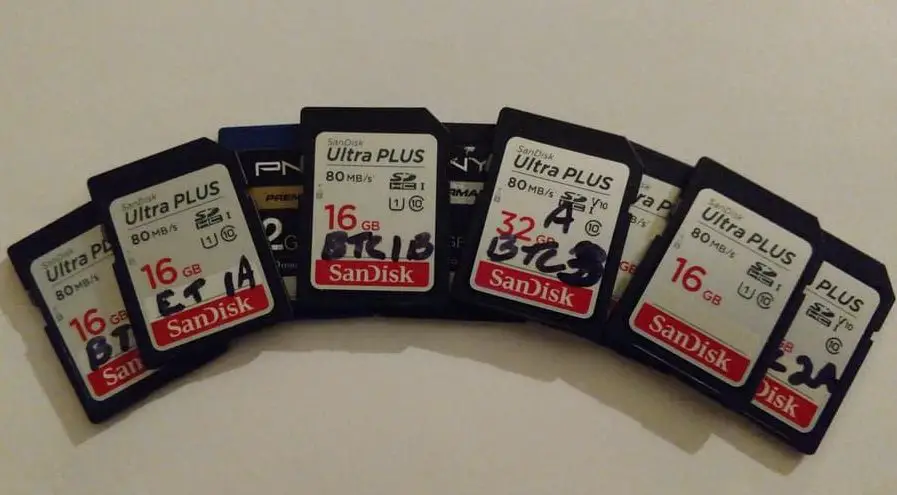
Lets start with the storage capacity of your SD Card. First of all I recommend only using SanDisk or Sony SD cards. There is a reason they are brand name products, because they have a history of being of better quality than all others.
The storage capacity of a SD card is written in GB (gigabytes). Almost all trail cameras on today’s market accept an SD Card up to 32GB and a few accept cards up to 512GB. Now this is just the maximum size a camera can take, and doesn’t mean that is the size card you should use. There is of course many more calculations to determine the size card you should use.
While understanding the capacity for photos are pretty cut and dry, the amount of storage you will need for running your camera in video mode, takes a bit more work. An SD card’s capacity for videos is determined by the Mega bits per second (Mbps) or bit rate. In general the higher the bit rate a camera takes, the higher the quality of the video. Most trail camera manufacturers do not provide the bit rate of their cameras, but do provide the video resolution.
The approximate bit rates for the most common video resolutions are as follows:
- 720p – 5Mbps
- 1080p – 8Mbps
- 4K – 25Mbps
There are a number of calculations that convert bit rates into storage capacity, all of which can become tedious and unimportant the overall understanding of what size SD card you will need. Below is a chart that will give you the storage capacity for approximate minutes of recording time.
| 720p | 1080p | 4k | |
| 4GB | 80 Minutes | 60 Minutes | 20 Minutes |
| 8GB | 160 Minutes | 120 Minutes | 40 Minutes |
| 16GB | 320 Minutes | 240 Minutes | 80 Minutes |
| 32 GB | 640 Minutes | 480 Minutes | 160 Minutes |
| 64 GB | 1280 Minutes | 960 Minutes | 320 Minutes |
When setting your video length on you trail camera it is important to understand the capacity of your SD card. If your SD card will only hold 60 minutes of video and you plan on setting the video length at 30 second clips, you will only have the capacity for roughly 120 video clips. Over the course of a two month soak that is as little as two animals walking by your camera a day.
Speed Rating
The speed rating for trail cameras, is the speed in which video, or photos can be written to the SD card. For trail cameras, there are only two speed class ratings that you need to concern yourself with: Speed class and Ultra High Speed Class (UHS Speed Class).
On SD cards you will find another classification that is named Video Speed Class. While we are talking about writing recorded video to an SD card, it may seem confusing, but Video Speed class not only is completely unnecessary, in most cases is not going to be compatible with your trail camera.
The rating for both Speed Class and Ultra High Speed Class, tells us how quickly the SD card can write in megabits per second. The charts below show the speed rating per card.
| Speed Class | Megabits Per Second |
| 2 | 2 MB/S |
| 4 | 4 MB/S |
| 6 | 6 MB/S |
| 8 | 8 MB/S |
| 10 | 10 MB/S |
| UHS Class | Megabits Per Second |
| 1 | 10 MB/S |
| 3 | 30 MB/S |
Applying the MBPS for each of the 3 main video resolutions by trail cameras, here is the recommended minimum speed class size needed for your trail camera:
- 720p – 5Mbps – Speed Class 6
- 1080p – 8Mbps – Speed Class 8
- 4k – 25Mbps- UHS Class 3
SD Card Types
There are three main types of SD memory cards: Standard SD, SD High Capacity (SDHC), and SD Extended Capacity (SDXC). Each classification of SD memory cards has its own capacity size, speed rating, and compatibility. Here is a break down of each type of SD card:
- Standard SD- Have a memory capacity of of 128MB to 2GB. These cards have the ability to work in all devices that support standard SD, SDHC and SDXC. Standard writing speeds are 2, 4, 6, 8, and 10.
- SD High Capacity- Have a capacity between 4GB and 32GB. Cameras that are manufactured after 2008 should be SDHC compatible. SDHC cards are not backward compatible, meaning they will not work in devices that only take standard SD cards. They will however work in trail cameras that accept SD Extended Capacity.The speed rating for SDHC memory cards comes in UHS speed class 1 or 3.
- SD Extended Capacity- Has capacities that range from 64GB- 2TB. While most trail cameras on the market today have a 32GB capacity, higher capacity units are becoming more popular as technology increases. These cards are not backward compatibile, so they will not work in trail camera units that are specifically designed for SDHC or standard SD cards. SDXC uses the same UHS speed class ranking of 1 or 3, that the SD high capacity card does. Essentially the only difference between the two cards is the memory capacity.
Why you should use Video mode
Using video on your trail camera can come with a lot of benefits. Having the opportunity to see how animals react to one another is probably the most engaging.
Vocalization
As a hunter, it is beneficial to see and hear, grunts, wheezes, gobbles and other forms of interaction that animals have with each other.
One dominate turkey might not make much noise, while another might be extremely vocal. The same goes for deer. You might hear one buck grunt in pursuit of a hot doe, but another buck might not make any noise what so ever. All of this vocal information is important in pursuit of a specific animal.
Direction
When you use your trail camera in photo mode, you see a series of photos that you need to try and piece together. Most of the time you will see the deer for a handful of pictures and he will be gone. What direction did he go, and where did he come from?
As you begin to use video mode, you will be able to pick out the speed and direction an animal moves on a more consistent basis. While you would possibly miss the body language of a deer cutting off the trail and heading down a ridge with photos, video will give you the all of the little intricate movements that help you pattern a deer better.
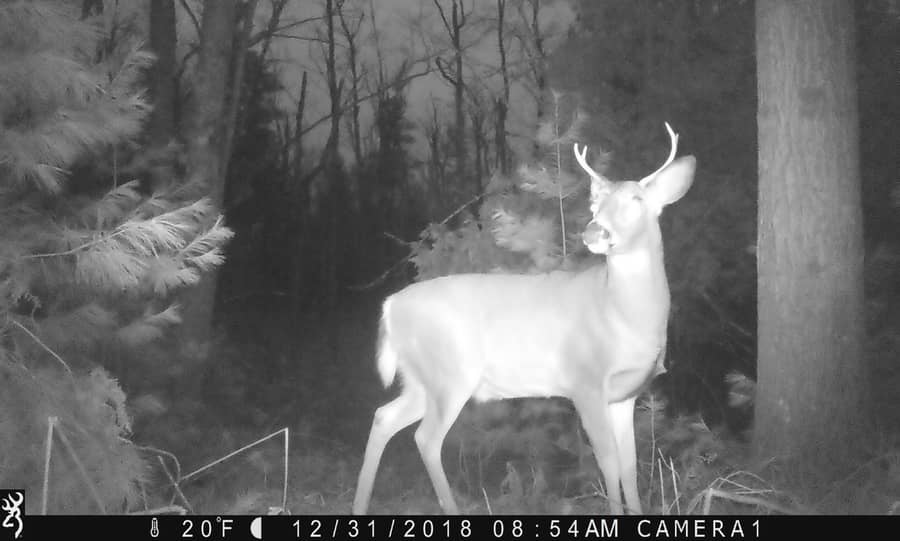
Motion Blur
If you have ever dealt with motion blur with trail camera photos, you know how frustrating it can be. The reason why motion blur occurs is simply because there is not enough light to manipulate a proper exposure. In order for a camera to capture motion, it must use a fast shutter speed, with the offset of allowing less light into the image sensor, thus creating the blur.
With Video mode, you will take the entire shutter speed out of the equation. When a video is activated on your trail camera, the shutter will remain wide open, in order to capture a seamless video. In doing so, all of the light within the immediate area, whether be from the IR flash, or the nature light in the setting, will go directly to the image sensor allowing for a more clear exposure. When you use video mode, you can say good bye to motion blur.
More Fun
Using video is just simply more fun, in the same way it is just more fun (for most people) to watch a video than look at a picture book. You no longer have to use you imagination to play out the scenario, the entire encounter is displayed right in front of you.
The Drawbacks From Video Mode
While there are plenty of reasons that you should use video on your trail camera, if does come with a few drawbacks. Most of which we have already covered, but here is a review of some of the key disadvantages:
- You will experience a slower trigger speed, and will need to adjust the angle of your camera to compensate.
- You will have as low as 25% of battery life, from what you would receive from photo modes
- You will need to use a higher speed class SD card with more GB in order to store larger files
- Video mode should not be used for every situation. Some situations such as mineral sites, and feeders will simply eat up storage space on your SD card
- You will not have a photo to share, with friends or use as a screen savor on your computer. This can be remedied by checking out our article on How To Extract A Photo From A Trail Camera Video
Trail Camera Recommendations For Video Mode
I would be remissed if I didn’t give recommendations for a few trail cameras I have found to be exceptional at recording video.
Browning Dark Ops Pro DCL
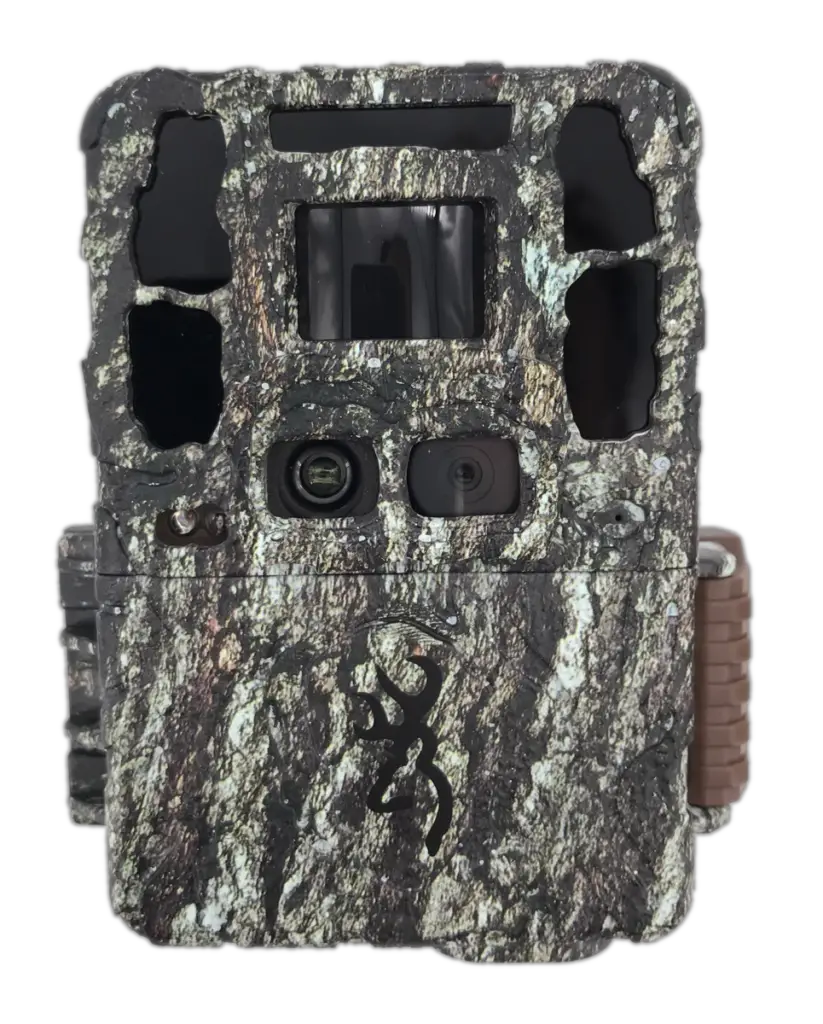
The Browning Dark Ops Pro is one of the better trail cameras I have used for video. It comes with a dual lens technology that allows the camera to set all of the exposure tables to create the best of both day and night time imagery. Recording at 1080p Full HD quality, it offers 60 frames per second, which is the best frame rate on the trail camera market.
The Dark Ops Pro XD also utilizes Browning’s patented Smart IR Video mode, which means you will never have to set video lengths again.
With this model I would recommend using a SanDisk UHS Class 1, 32GB SD card. This will give you the recording speed needed with plenty of storage space for a couple of months worth of video.
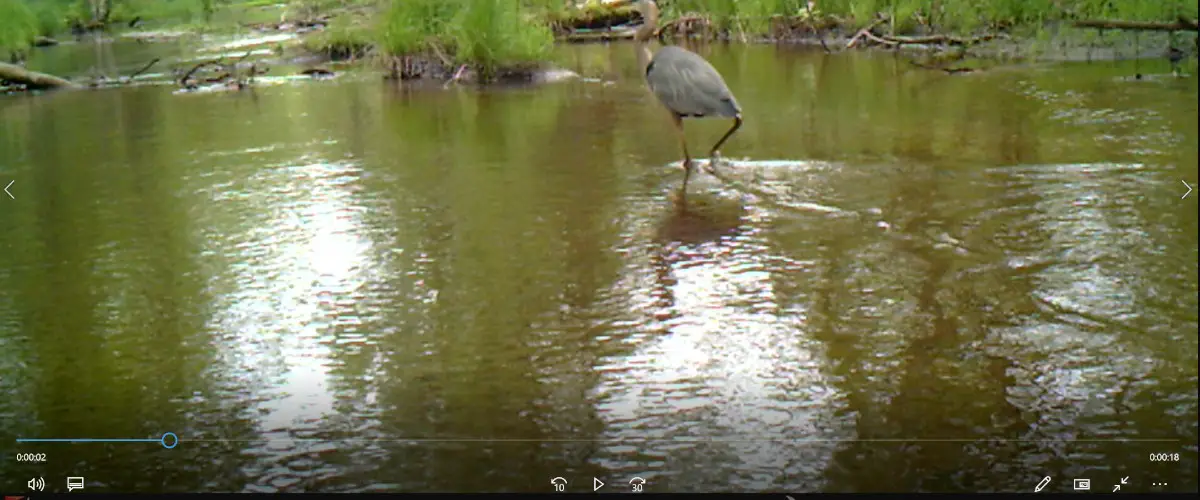
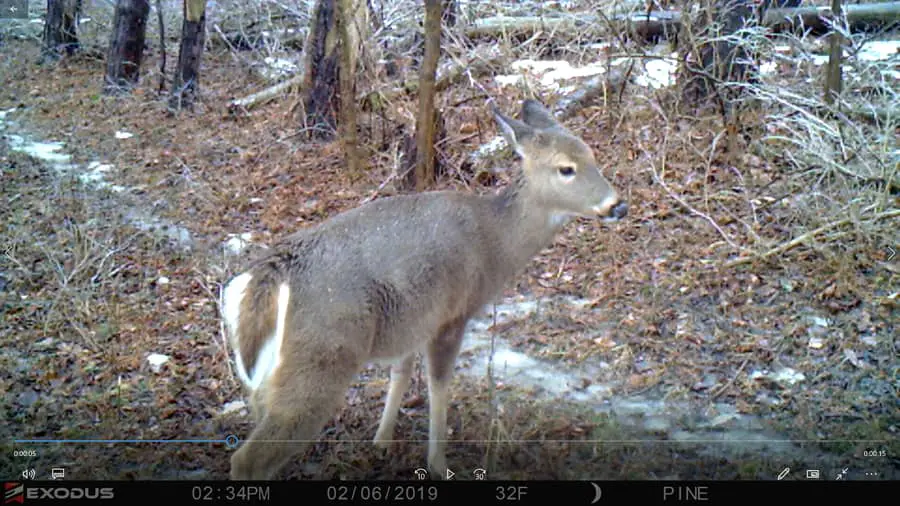
Exodus Lift II
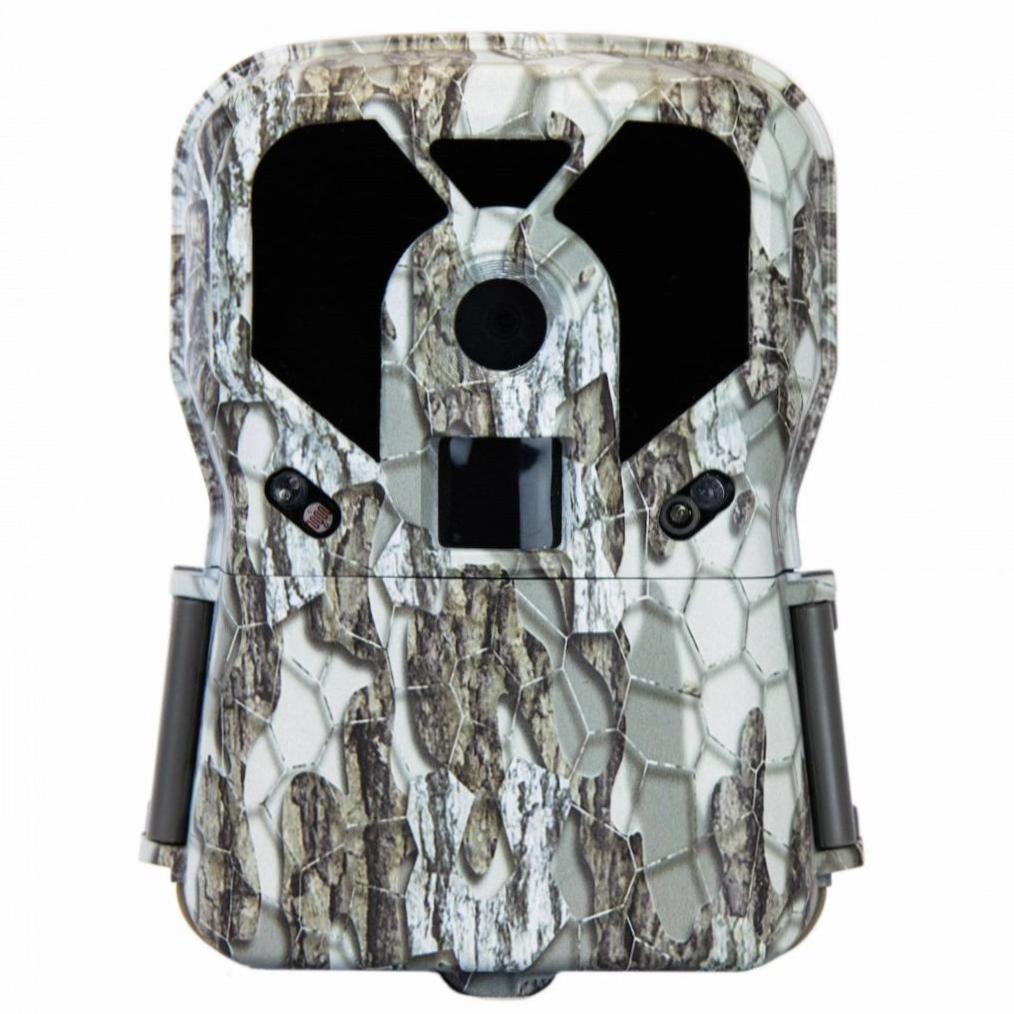
Exodus Lift II has a great video option for trail cameras as well. This camera, made by the company with the industry’s leading manufacturer warranty of 5 years, has incredible crisp videos, with unparalleled quality. Recording at 1080p Full HD, at 30 FPS, I promise you is one of the best on the market.
With this model, just like the Dark Ops Pro XD I would recommend using a Sandisk UHS Class 1, 32GB SD card. Although the battery life on this camera is so good, you could probably utilize a 64 GB for longer soaks.