
Trail cameras are built tough. What other electronic device on the market is made to be outside in all of the different elements throughout the year? All the rain, snow, ice, and fog that mother nature has to offer beats on your camera with very little impact on its ability to function properly.
Extreme weather conditions however can have an affect on your trail camera. From poor battery life, to the onslaught of false triggers, there are many variables that weather can play in the effectiveness of your camera.
Cold Weather
In the North, winter weather can be brutal. Drifting snow, cold temperatures, and freezing rain can take a toll on our bodies, our houses, our vehicles, and also our trail cameras.
In fact as I sit here and write this article we are in the midst of what meteorologists are calling a polar vortex. Actual temperatures are hanging around -20 F with windchills hovering around -35 F. Lake Effect snow is pounding West Michigan, and whiteout conditions are causing visibility under 100 yards.
County and state buildings are closed, schools are closed, and sections of almost every highway and interstate have been blocked off to all non emergency vehicles. Everyone is warned to stay inside, and off the roads unless necessary. While all of this is happening, all I can think about is how this weather is taking a beating on my trail cameras.
Cold weather Rating
The first thing you need to think about when setting your cameras out for the winter, is the cold weather rating on your trail camera. All cameras have a maximum and minimum temperature that they are designed to withstand. All trail cameras seem to work sufficiently when temperatures drop below freezing (32 F), but most begin to occur problems when temperatures drop into the single digits.
If you are planing on setting your cameras through the harshest parts of the winter, make sure that they are rated for sub zero temperatures. Most trail cameras will have their temperature ratings located in their owners manual, but if they are not, be sure to contact the manufacturer to assure that your camera is able to withstand the extreme temperatures.
Testing Your Trail Camera
While each camera has an optimal operating temperature, it doesn’t mean that it will withstand the severe beating of weather. After all my old pickup has a speedometer that goes up to 180 mph but I know better than to drive that fast.
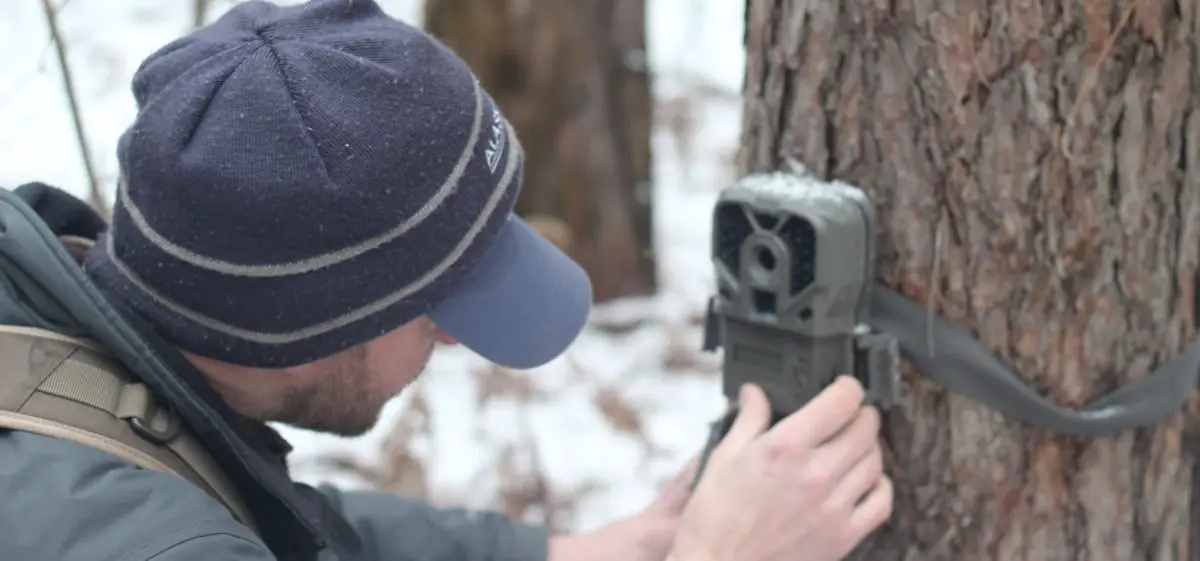
The only way you will have confidence in taking your camera out into the extreme cold is by testing it. The last thing you want to do is to set your camera out for a few months, and have it quit working only a few days into the winter season.
What I like to do is what is called the freezer test. Turn your camera on, and place it in the freezer so that it will take a picture or video every time you open the door. This allows you to know that in sub freezing temperatures that it will still operate as normal.
Now placing a camera in the freezer is a far cry from allowing mother nature to beat on it, but it will give you a good indication of the camera’s ability to withstand the colder temperature.
Once the camera passes the freezer test, I often hang the camera outside the house and allow the camera to acclimate to the winter weather. Hang it near the drive way or pointing at the front door, so every time someone comes in our out of the house, the camera is triggered. This will give you a better understanding of how the camera will operate before dropping it into the woods and allowing it to soak.
Batteries
During the winter months there is nothing more important to the operation of your camera then the batteries you use. Believe it or not, all batteries are not made the same. The two main styles of batteries that are used for trail cameras are typically Alkaline and Lithium ion.
Alkaline Batteries
Alkaline batteries create their power from a chemical reaction between zinc and manganese oxide. The electrode in alkaline batteries is water based, and when temperatures outside begin to freeze, we all know what happens to water; it freezes too.
With a precharge of 1.5v per battery, as the battery is consumed, it looses output, supplying less power to the camera which will in return affect everything from night time flash to trigger speeds. In cold weather the freezing electrodes quickly slow down the output of the battery, and has an almost immediate effect on the battery’s capacity.
Once the water based electrodes completely freeze, your alkaline battery has a very real probability of splitting, cracking, leaking, or what most people call exploding. I don’t need to explain the complications that chemicals from a battery will have on the internal components of a trail camera, just know its not a good combination.
Lithium ion
Most trail cameras rely on a battery output of 1.5v, with lithium ion batteries, the output will be closer to 1.7v. Unlike Alkaline batteries which will have a gradual discharge of power as it is consumed by the camera, Lithium batteries will produce 1.7v until the power is completely gone. This will give you a better output throughout the entire life cycle of the battery.
And Lithium ion batteries are the iron man of batteries when it comes to cold weather applications. They are virtually unaffected by cold weather, with an operation temperature as low as -40 F. If you are going to use your trail cameras during the winter, you absolutely need to invest in Lithium ion batteries.
While the upfront cost will be more than alkaline, it makes sense to run your cameras with lithium batteries during cold weather. The best place to find base line prices on lithium batteries is from Amazon. For one reason or another, they carry the same brand name batteries as your local supermarket, but at a much lower cost per battery.
Setting Your Camera For Winter
When you are dealing with cold weather, sometimes it is best to scale back on what you are asking your camera to perform. The cold weather can have a drastic impact on the speed in which your camera works.
In the spring summer and fall, it is not uncommon for me to run most of my trail cameras on video mode. Using video mode, slows down the trigger speed on all cameras, and requires the camera to work harder, the SD card downloads at a faster bit rate, and the night time flash stays on for longer periods of time.
When your camera is fighting the frigid temperatures of the winter months, asking it to perform at its peak, is a slightly unrealistic expectation. Using less demanding functions on your camera will decrease the work your camera has to do, and also save your battery during weather that is known to drain energy.
Using simple two or three shot burst mode, is the easiest way to control the amount of work that your camera will need to do. In these applications, the only things that are needed to operate is the PIR sensor, the light meter system, and the basic functions of the shutter. And uploading photos to the SD card requires less bit rate, allowing photos to load and save at a faster clip.
Most Common Problems With Cold Weather
Most weather related breakdowns are not related to the actual functioning of the trail camera, but most often affects the actual screen of the camera. I have had multiple cameras that had been functioning properly in terms of detecting movement and taking photographs, yet when I went to check the cameras, the menu on the camera would not display. It was impossible to see, change settings and format the SD card.
While this becomes a huge problem when running cameras during the winter, there isn’t much of a solution. The camera is fighting the cold to display the lights behind the screen, and the only remedy is to bring the camera into a warm environment for a bit and allow the camera to warm up. This problem often occurs more frequently with cheaper model cameras. Check the cold weather rating on your camera to assure it will be able to function properly in extreme conditions.
Ice
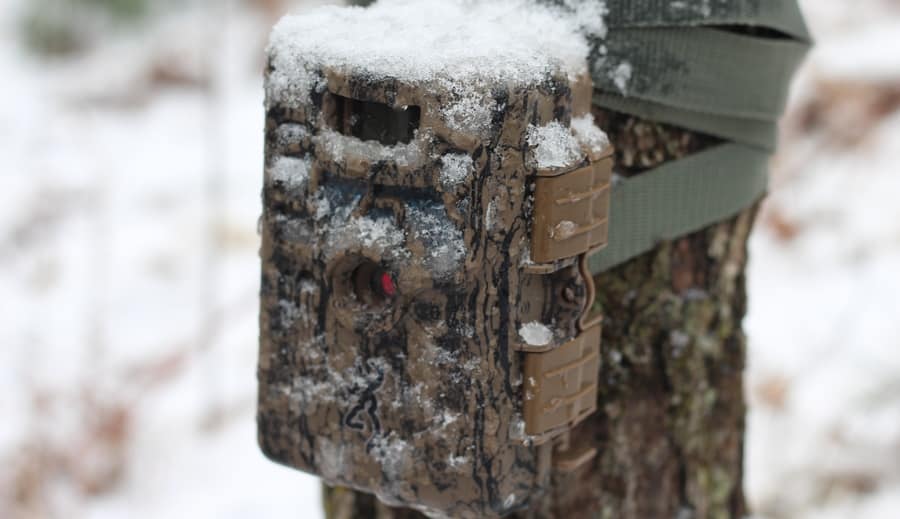
Ice build up on your trail camera is probably one of the hardest weather elements mother nature can throw at you. Very seldom is it caused by a sudden ice storm, but rather is most often an accumulation over time. When snow melts and then quickly refreezes or when a warmer winter day creates a rain storm, followed by a day of colder weather, is when most ice build up occurs.
The problem with ice is that there is no simple solution of how to hang your camera, or a windex type product you can use to coat your camera to avoid it. Rather, the only way to rid your trail camera from ice, is to either not use your camera during the winter months, or to physically remove ice from it.
Lens, PIR Sensor, Light Meter, and Hinges
While ice covers everything, it is important to know that it is not imperative to remove ice from every inch of your camera. The housing of the camera is designed to withstand the brutality of ice build up, but there are a few areas in which you will need to focus your efforts on removing ice, to insure you have consistent trail camera results.
One of the more frustrating things about ice is when it builds up on the hinges leaving you locked out from accessing your batteries and SD card. These areas are typically built rugged enough, where you can chip away at the ice with a car key or any other small blunt object like a metal nail. Be sure to remove as much ice as possible, and don’t force the hinges open. While they are built sturdy, forcing plastic to break open can result in broken hinges, creating a bigger problem than you started with.
The lens, the PIR sensor, and the light meter are the most fragile aspects of your camera. You want to make sure that you are not just chipping ice with a car key trying to remove the build up. This aggressive tactic while it works well for more rugged built aspects like your hinges, can cause scratches on some of the most intricate parts of your camera.
What I have found that works best is using a hand warmer or even a lock deicer to melt the ice. What is best about these products is that you only need to use it long enough to soften the ice, so that you can remove the remaining ice buildup with your fingers. Once these fragile areas are removed of ice, simply use a micro fiber cloth to wipe away all of the remaining water residue to ensure that it doesn’t refreeze once you walk away.
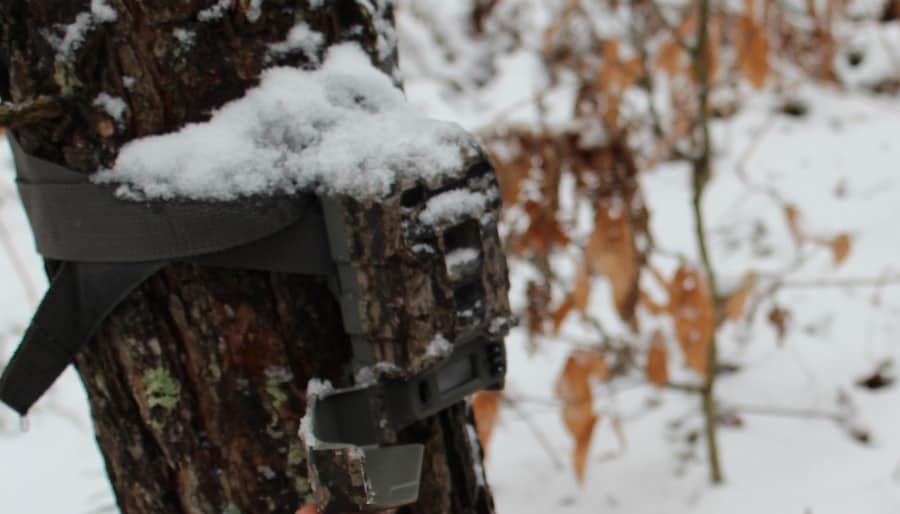
Snow
As a child, we all loved snow. Going outside, building snow forts and making snowmen was nothing but pure enjoyment. As we grow older, snow becomes more of a constant problem that creates work. Shoveling the driveway, removing snow buildup from your roof, and of course driving in it. When it comes to trail cameras, snow doesn’t have to be more work, just a little forethought before setting your cameras for the winter.
Mounting
One of the things that most people overlook when running trail cameras during the cold winter weather is how they mount their cameras. I know I have learnt this lesson the hard way myself.
This winter I placed a camera overlooking a drainage ditch coming out of a swamp. The only suitable place to hang the camera was on a tree above the ditch. But in order to get a good angle on the deer that were moving through, I placed the camera at the base of the tree and angled it downward.
Admittedly with lack of cognitive thought, I left the camera to soak throughout the winter. I knew the ditch caught fallen acorns during the fall and that it would attract deer who could dig through snow to reach a large collection of food. What I didn’t take into account was the snow.
After two months of pounding snowy weather, wind drifts, along with warm ups and quick freezing temperatures, I had to dig out my camera that was covered in 3 feet of snow.
I have had many other occasions in which I have used cameras during the winter, only to find that it had accumulated snow on and around the housing, rendering it virtually useless for those months.
From that experience though I learned a valuable lesson about hanging trail cameras during the winter. It is best to hang them high and angle them down. Not only does this keep them from getting caught in deep snow drifts, but by using a trail camera mounting arm, you are able to keep the camera away from the tree where snow is easily collected.
The lack of snow being collected between the tree and the camera, minimizes chances of snow building up in front of the lens, IR emitters and the PIR sensor, all of which are vital to the operation of the trail camera.
Theft
With all of the problems that snow brings to trail cameras, the farthest thing from your mind is probably theft of your camera. But the truth is, there is no time that is easier for a dishonest person to find and steal your trail cameras than during the snowy months.
The same way you use tracks in the snow to determine the direction of deer movement, thieves can use your tracks to to locate all of your trail cameras. In order to protect you investment, you need to be conscious of this. Don’t get out of your truck and walk directly to your camera, and leave and walk directly to your next one. It is an easy trail to follow, and an easy way to lose your cameras. Take the time and meander through the woods. Check out some areas you need to scout, and make a loop back to you camera that isn’t directly from the truck. Making a thief follow you for a greater distance, often will result in them quitting before they ever get to your first camera.
Another trick I have found that seems to work is to use snow shoes or even cross country skis. More often that not, these types of track appear like a person just out for a winter activity rather than someone who is checking trail cameras.
Hot Weather
For the most part, heat will have less of an affect on your trail camera then cold weather will. Most cameras are rated for temperatures that are higher than what you will see on a typical summer forecast, and lithium ion batteries will effectively work in temperatures into the 140’s. However, the camera’s ability to work in hot weather is not the issue, but rather how effective some of the components can be.
PIR Sensor
The PIR sensor on a trail camera is the electronic component that tells the camera when to activate a picture or video. How it works, in simple terms is it measures the infrared radiation of the area, and detects any change of infrared heat within the detection zone. The key to activating the camera however is that the infrared change must also have motion.
For instance if your camera is sitting along a field edge on a fall day, the PIR sensor is detecting the heat from the surrounding area. When a deer walks into the detection zone, the PIR sensor will recognize the change in infrared heat that a deer exudes, and when the deer moves, the camera will take a photo.
What happens during the summer months, is that objects around the camera are absorbing more infrared heat from the direct sun, creating a very small difference between grasses, trees, and leaves, and the amount of infrared heat a deer would produce. This creates two problems:
- Deer will be less likely to trigger the PIR sensor due to a lack of detectable difference between the infrared heat of the animal and the infrared heat of the surrounding areas. This can create your camera to not take photos of deer when walking by.
- The movement of ferns, grass, and branches that sway in the wind could activate the PIR sensor to activate the camera based on the increased infrared heat, and the movement created by wind. When this happens you are likely to have more false triggers.
Some cameras have the ability to adjust the sensitivity of the PIR sensor. In these instances, you would want to turn the sensitivity up if the camera is missing photos of deer, and you would want to turn the PIR sensitivity down if you are receiving hundreds of false triggers.
While each camera is different, and each setting is different, there is no exact science to the best sensitivity rating on a trail camera. It unfortunately is a situation where you will need to play with the settings to figure out what is best for your camera in your situation.
Fogging Camera Lens
The other major problem with the hot weather months is fogging of your trail camera lens. This often happens most often when the night time air is cooler than what day time temperatures are, making the glass on your lens to cool down. Then when the sun begins to rise in the morning, the air heats up faster than the lens, and creates condensation build up on the lens. The condensation will be present throughout the morning hours until the temperature of the lens acclimates to the same temperature of the surrounding air.
The best solution that I have found is the use of a product called Cat Crap. It is an anti fogging solution that is applied directly to the lens of your trail camera. It is designed specifically for the use of cameras, and many professional photographers use this product when shooting outdoors as well.
If you are having this problem, we have a great article Dealing with Trail Camera Condensation, that will walk you through a few tricks on how to prevent this from happening. It is worth checking out.
Rain
Trail cameras are designed to be water proof. They have to be considering in many cases they are left in the field for months and even years at a time. The problem however is that when there is a leak, electronics and water do not work well together.
The most important aspect of keeping your camera safe from water damage is the rubber seal around the housing. It is important to check the seal every time you pull an SD Card. Visually check the seal, assuring there are no cracks or wear around the door. When this does happen however, it is important to contact the manufactuerer immediately and get a replacement seal.
The habit of simply checking the seal can be the difference between having extensive water damage and keeping the trail camera in the field for years to come.